How to Update to the Latest Version of Hugo
This article was updated on 24 June 2023.
Content Links
Introduction
Get and download the latest release
Extract the downloaded ZIP folder
Confirm Hugo version
Conclusion
Helpful Links
Introduction
Why did I update to the latest release?
My Hugo website, which I built in the Summer of 2022, was dormant during my Fall coursework.
After completing my Fall courses, I looked at my website again and decided to update it.
I wanted a brand-new clean, simple minimal theme, and I noticed that I had to get the latest release of Hugo.
This article is about updating my Hugo website to the latest release of Hugo on the Windows 10 operating system (OS).
Later I will write about how I changed my website’s Hugo theme to the theme I liked better.
When Hugo has a new release, my computer doesn’t automatically notify me of the latest release like the Windows operating system, where I click the Check for updates button, and my computer downloads and installs the update.
I must go to the Hugo website, download the latest release, and install it.
Updating to Hugo’s latest release is like downloading and installing Hugo for the first time but minus the first steps of creating the site, adding content, configuring, and publishing the site.
The easiest method (and I recommend this because I’m not CLI savvy 😭) to update my Hugo website’s version is to get and download the prebuilt binary from Hugo’s latest releases GitHub page.
Since I’m not CLI savvy, I’m not using package managers (Chocolatey, Scoop), Docker, or building from source. For more on these install methods, visit Windows | Hugo.
What is a prebuilt binary?
I searched for the word prebuilt in Merriam-Webster, and prebuilt doesn’t exist in the dictionary and thesaurus pages.
In the Cambridge dictionary, prebuilt means prefabricated, as in a prefabricated building.
I can see why the developers didn’t call the Hugo file prefabricated binary. 😆
Anyway, a binary is something that has two parts. In computing, it’s a number system that involves 0 and 1 and values involving a mix of just 0s and 1s.
Binary is a character in the film The Matrix Reloaded. 🤓
Do you remember the binary digital code rain in The Matrix? 😻
If I were to explain binary code in a simple sentence, I would say “Binary code is how computers talk and represent information.”
A Hugo prebuilt binary is just a Hugo file in a ZIP format that you download and extract to a target (specific) folder on the computer. And you can run the extracted files as is.
There’re prebuilt binaries for Windows, Mac, and Linux operating systems. 🙌🏼
Get and download the latest release
-
Go to Hugo’s latest releases page in GitHub.
There’s essential information (recommended reading 😂) about the latest release that’ll give you new features, notes, bug fixes, and improvements. 🤓
-
Scroll down to the end of the latest release’s module to the Assets section that lists the links to the archives of the prebuilt binaries editions for specific operating systems and architecture.
Architecture in computer engineering is “the conceptual design and fundamental operational structure of a computer system”.
-
Click the Show all 23 assets link to view the complete list.
The Show all 23 assets link might not appear for you. So, ignore this step.
The Show all 23 assets link appeared when I visited the releases page after not seeing it since my asset download last summer.
Still, the link disappeared since I’ve been on the page a lot drafting this article, and I see the complete asset list every time.
-
Look for the link to the edition you need and for the computer’s OS.
Hugo has two editions: extended and standard.
The extended edition:
- converts SASS code into standard CSS code using the embedded LibSass transpiler,
- not required to use the Dart Sass transpiler,
- and decodes and encodes WebP images.
The standard edition decodes WebP images.
I chose the standard edition because I don’t use SCSS/SASS and WebP.
The Hugo Installation Windows web page recommends installing the extended version, but you decide.
-
Next, check that the computer’s OS is 64-bit.
How to find the Windows system details
- On the taskbar, right-click the Windows Start icon.
- A Power User Menu (PUM) pops up. On the PUM, click on System.
- In the Settings window, see an About header, and below this header is the Device specifications.
- Under device specs, you’ll see something like System type 64-bit operating system, x64-based processor.
-
In the latest release’s Assets section, there’re three zip folders that you can choose one to download based on the computer’s OS and architecture and your edition preference:
- hugo_0.114.0_windows-amd64.zip
- hugo_0.114.0_windows-arm64.zip
- hugo_extended_0.114.0_windows-amd64.zip
Note that this asset’s version was the latest release during this writing.
What’s the difference between amd64 and arm64?
Both are central processing unit (CPU) architectures.
ARM64 is the 64-bit version of the Advanced RISC Machine (ARM) architecture used on smartphones and computer operating systems.
AMD64 is the 64-bit version of the x86 architecture, which Intel developed and later extended to 64-bit by AMD and is the architecture for personal computers and servers.
So as an example, based on my following requirements:
- My Windows OS has a 64-bit operating system
- My computer’s CPU architecture is AMD64
- I don’t use SCSS/SASS and WebP
I needed to download the hugo_0.114.0_windows-amd64.zip folder.
So, select the asset suited for the computer’s OS, architecture, and edition preference.
-
Download the selected latest release ZIP folder to the Downloads directory in the Local Disk (C:).
Extract the downloaded ZIP folder
Now that you’ve downloaded the ZIP folder, the next step is to extract the contents of this ZIP folder to the bin folder.
You must already have the following Hugo bin folder on the Local Disk (C:):
C:\Hugo\bin
I recommend this critical File Explorer tip
In my File Explorer in the View tab in the Show/hide group, I’ve checked the Item check boxes because this view preference makes it easy for me to select my folders and files carefully when I want to open, move, or remove them.
Without the checked Item check boxes preference, I’ve often clicked on a folder or file by mistake, producing outcomes that annoy me, like removing a file by mistake or moving a file to the wrong folder.
So having the Item check boxes permanently checked has kept my File Explorer folder/file selection activities stress-free.
If you’re up for the same, keep the Item check boxes checked.
Extract to the bin folder
Extract all the contents of the downloaded ZIP folder into the bin folder by doing the following steps:
-
In the File Explorer window, click on the Downloads folder that holds the Hugo release ZIP folder.
-
Move the mouse pointer to the Hugo ZIP folder and click its checkbox to select it.
The Extract tab should appear at the top of the Downloads window.
-
Click on the Extract tab.
-
See a folder icon right below the Extract tab that says Extract all. Click on the folder icon.
An Extract Compressed (Zipped) Folders window appears where you can Select a Destination and Extract Files.
-
Click the Browse button and find the bin folder in the Hugo folder.
You’ll see something similar to the images depicted below.


-
Click on the Select Folder button.
You’ll see something similar to the image depicted below.
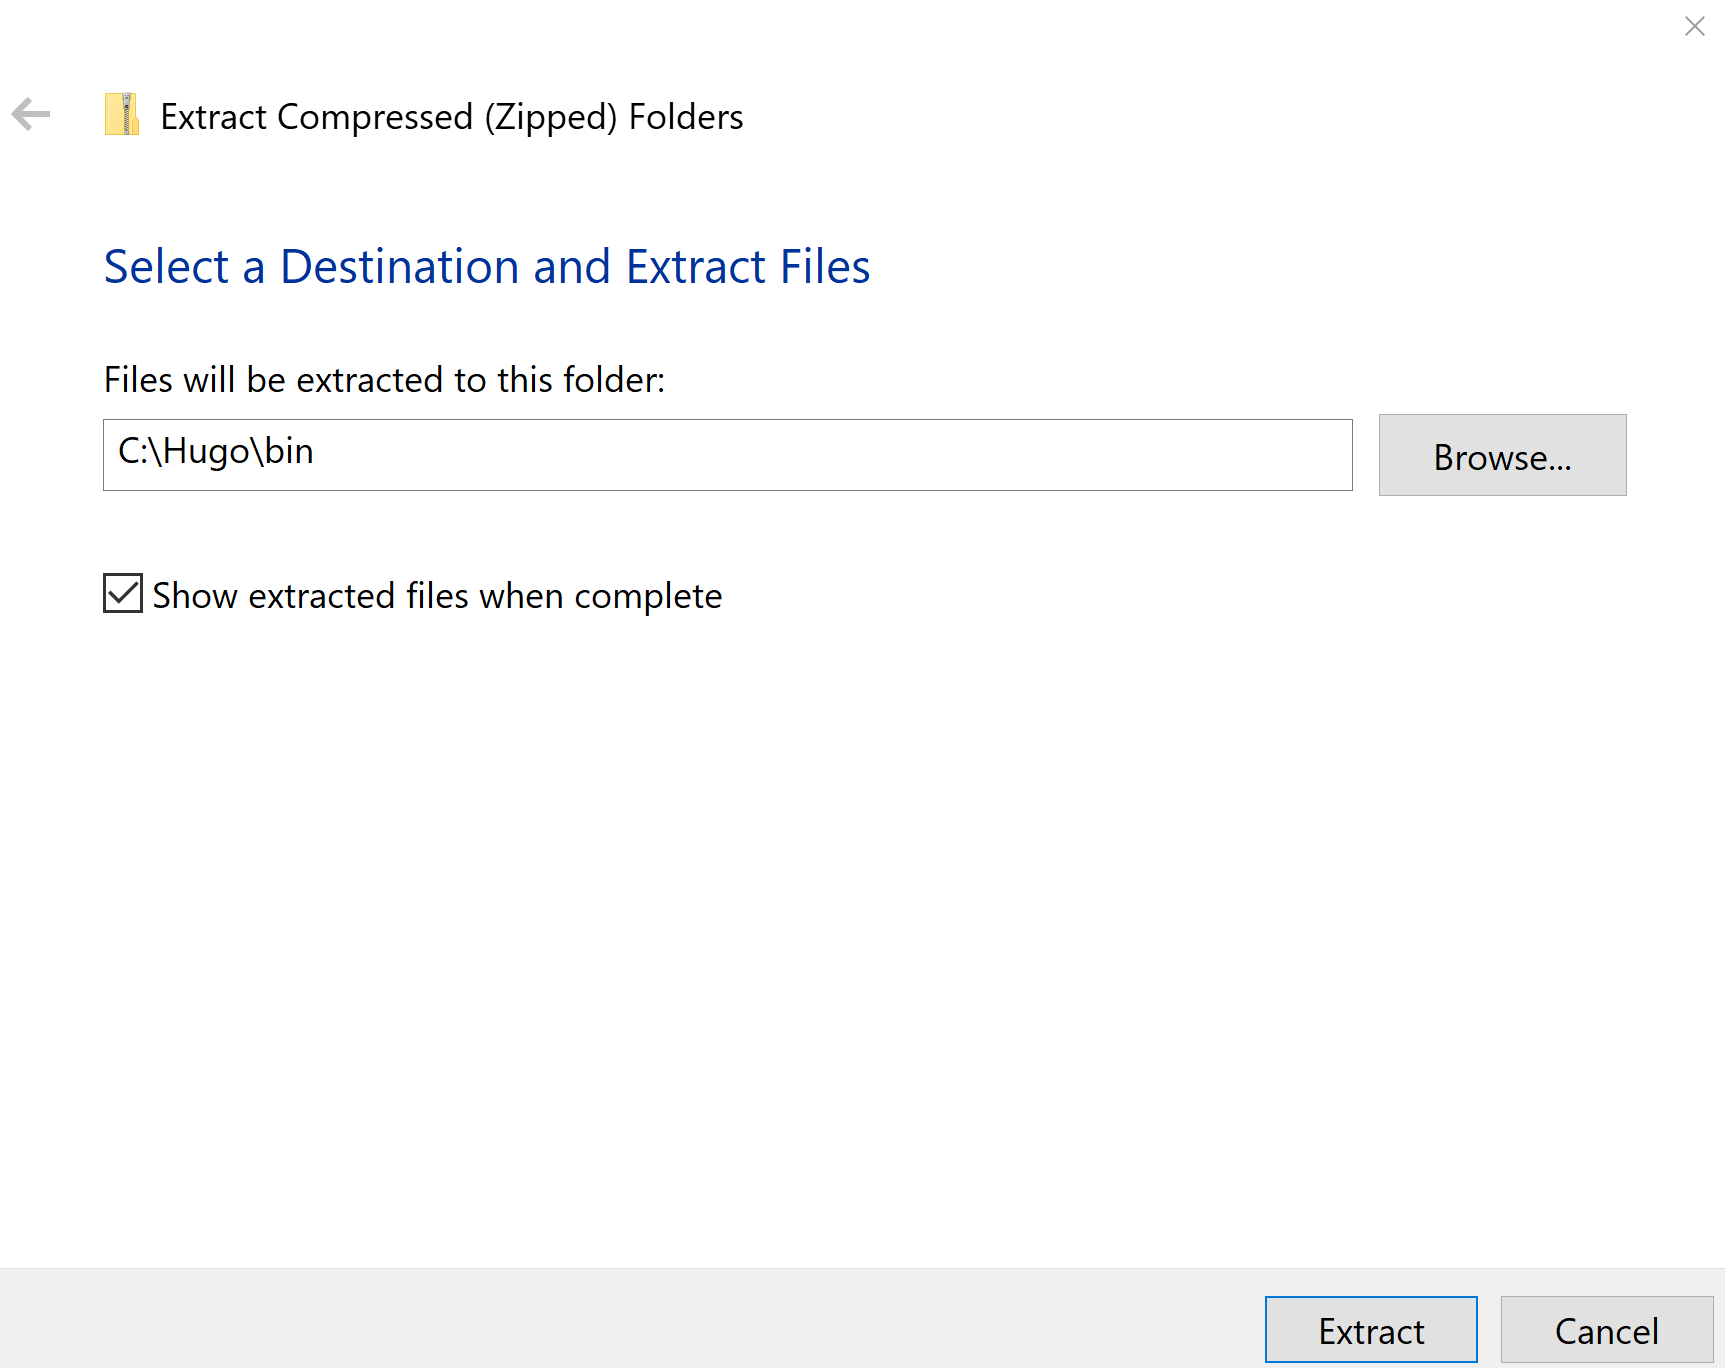
I recommend keeping the Show extracted files when complete checked.
-
Click the Extract button.
The ZIP folder will extract all its contents in the bin folder, replacing the hugo.exe, LICENSE, and README.md files.
A Replace or Skip Files window pops up.
-
Click on Replace the files in the destination.
The replacement process takes seconds, and a window displays the files of the bin folder and a date modified column (I’ve checked that column to display in the folder’s view).
The next step is to confirm that the computer has the latest release.
Confirm Hugo version
Confirm that the computer has the latest release by following the below steps.
-
Right-click on the Windows Start icon on the taskbar.
-
Click on Command Prompt (Admin).
-
Type the following command at the command prompt to go to the Hugo website’s folder in the Local Disk (C:).
cd C:\Hugo\Sites\your-sites-nameThe cd command stands for change directory.
your-sites-name is your website’s name.
-
Then type
hugo version -
See a message like the one below telling you you have the latest Hugo release.
 C:\Hugo\Sites\your-sites-name>hugo version
 hugo v0.114.0-9df2ec7988e5a217a14901cc76c0b7e76b2e9f02 windows/amd64 BuildDate=2023-06-19T17:01:43Z VendorInfo=gohugoio
Conclusion
Now you know how to update to the latest release of Hugo. How do you feel? Good, I hope.
It’s time for some ice cream. 🙏🏼🍨
Take a break and play a video game 🎮 or do whatever. 🦦🧸
Helpful Links
Installing and updating Hugo on Windows
Thank you for reading!
Please share this how-to article with your family, friends, and anyone needing to download and install Hugo’s latest release.
Follow me on Instagram 😁